NVMe SSDs gained huge popularity in recent years. Due to its high-speed data transfer rate, it is a popular storage choice among PC gamers and professionals.
But, the sad news is, most of the PCs (especially older ones) don’t have M.2 slots to put NVMe into the work.
Well, if you are the owner of an older PC without M.2 slot and still want to use NVMe SSD, then this post is crafted for you.
Why?
Because I have shared 4 ways to connect NVMe SSD to PC without M.2 slot by using different types of adapters.
I have tested all these methods and I’m gonna share with you all the details.
We’ll also talk about the pros and cons of using those adapters to connect NVMe to your PC so that you can decide if you should go with them or get a new PC.
Related,
Ready to explore all this stuff?
Here are the solutions,
First of all,
Why is NVMe SSD Required For Gaming and Other Heavy Work?
If you’re a gamer, video editor, 3D artist, or any kind of heavy PC user, an NVMe SSD isn’t just a luxury, but it’s practically your necessity.
Why?
Unlike traditional HDDs or even SATA SSDs, NVMe (Non-Volatile Memory Express) uses the PCIe interface in your motherboard.
PCIe interface can deliver Ultra-fast read/write speeds up to 6x faster than SATA SSDs, 30x faster than HDDs.
That’s why you can experience a noticeable difference in system performance during high-intensity tasks like FPS gaming, 4K video editing, etc.
Let me break down the benefits of NVMe SSD in terms of use case:
NVMe SSD For Gamers:
- Faster Game Load Times
- Quicker Texture Rendering
- Reduced Lag from Storage Bottlenecks
For Heavy Workloads Like Video Editing and 3D Rendering:
- Faster Boot and App Launch Times
- Better Multitasking Quality and Speed
- Improved Data Transfer Speeds, like moving 4K video files or large project folders, become effortless.
If you’re going to build or upgrade your PC as a performance-based system, skipping an NVMe SSD can really hold you back.
It’s one of the important components to add to your system to make it ultra-fast for a performance-focused system.
4 Ways to Connect NVMe SSD to PC Without M.2 Slot
Let’s find out all the possible solutions to connect NVMe SSD to PC that does not have M.2 slot.
Option 1: Use a PCIe to NVMe Adapter Card

It is one of the most effective ways to connect an NVMe SSD to a PC without an M.2 slot.
You can use a PCIe to NVMe adapter card, which is easily available on the market.
These adapters let you plug your NVMe SSD into a spare PCIe x4, x8, or x16 slot on your motherboard. In this way, you can use these high-speed lanes for optimal performance.
How it works:
- Insert the NVMe SSD into the adapter’s M.2 slot.
- Plug the adapter card into an available PCIe slot on your motherboard.
- Boot into BIOS and ensure NVMe support is enabled (most modern BIOS versions support it. Just check if it’s enabled in the BIOS).
Why it’s a good option for gamers:
- It provides full speed of NVMe, especially when connected to PCIe Gen 3 or Gen 4 motherboards.
- Cost-effective (usually costs around $10–$30).
- No need for complex configuration because it’s a play device in most cases.
Note: Before spending your money on a PCIe to NVMe adapter card, check if your motherboard has an available PCIe slot, your case has enough clearance for the adapter card, and most importantly, check in BIOS if your motherboard supports NVMe.
This method is very popular among gamers and power users who want to upgrade their older desktops.
Option 2: Use a USB 3.2/Type-C to NVMe Enclosure
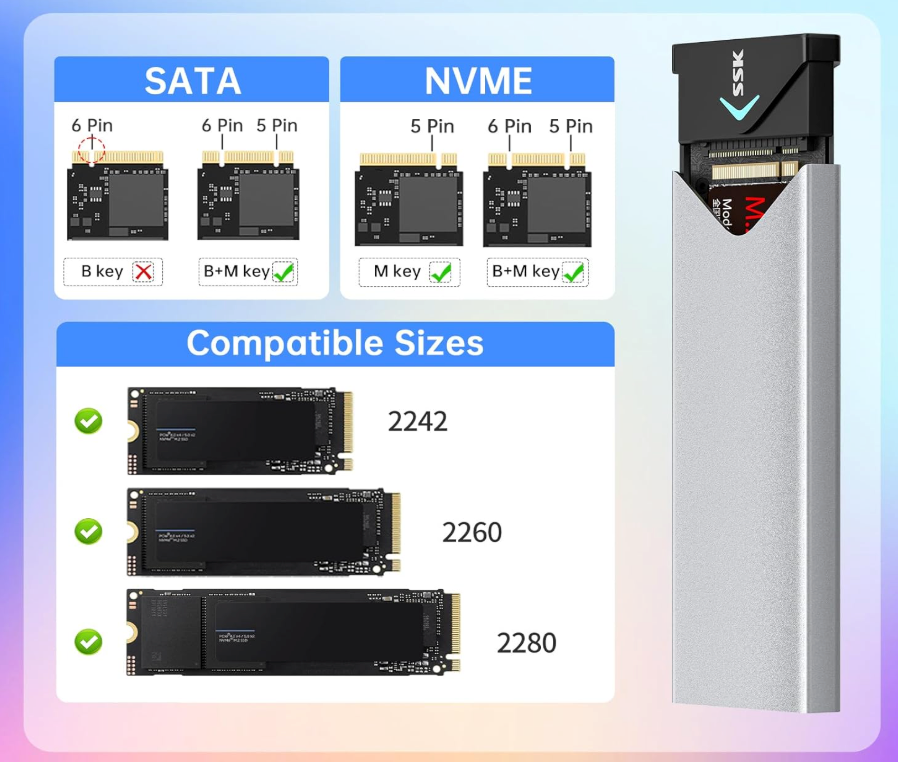
If your PC doesn’t have an M.2 slot and all your PCI slots are full, then you can try a USB 3.2 or Type-C to NVMe enclosure.
It is a great alternative to PCIe to NVMe adapter card.
This method turns your NVMe SSD into a high-speed external drive that you can connect via USB.
How it works:
- You have to insert your NVMe SSD into the enclosure.
- Connect the enclosure to your PC via a USB 3.2 Gen 2 or USB Type-C cable.
- Your system should detect it like any other external storage device.
Pros
- Super easy setup. You don’t need to open your PC case.
- Portable, compact, and perfect for gamers and creators on the move, because you can use it on a laptop too.
- USB 3.2 Gen 2 provides you with a speed of up to 10 Gbps, which is decent for most tasks.
Cons
- Slower speeds than internal NVMe and PCIe slots.
- The enclosure can overheat and limit the performance.
- It’s not ideal to use as an OS boot device.
While it won’t deliver full NVMe speeds like a PCIe adapter, it’s still significantly faster than traditional SATA drives.
Gamers can use this option for game storage, file transfers, or backups.
Just make sure that the enclosure supports your specific NVMe form factor (usually M-Key or B+M Key).
Option 3: Use a U.2 to M.2 Adapter (if motherboard supports U.2)
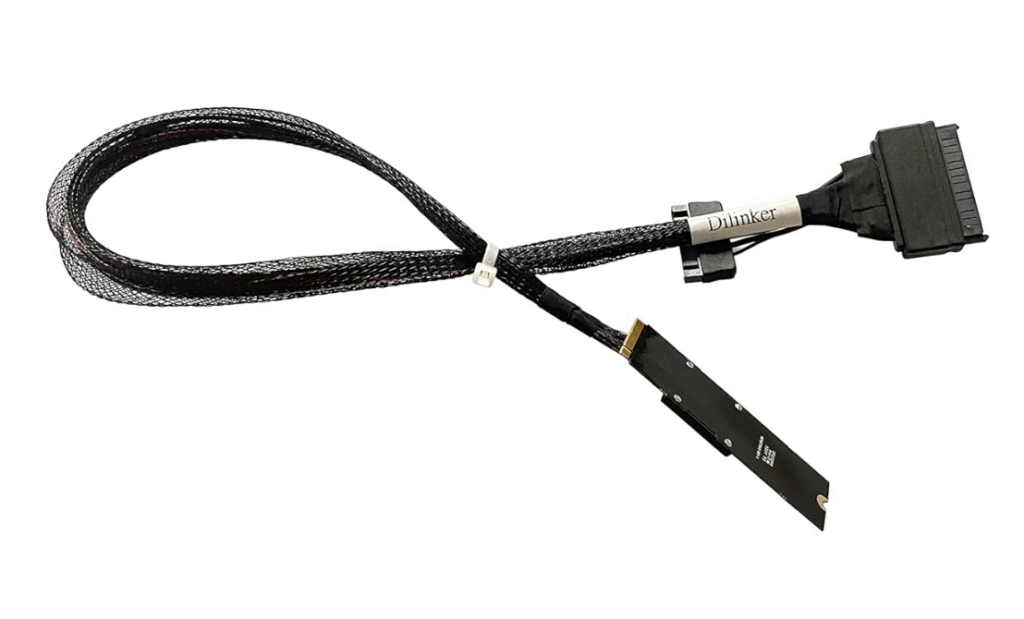
If your motherboard has a U.2 port, then it’s a great option for using NVMe SSD on your system without M.2 slot.
This less common but powerful interface can be a perfect alternative to M.2.
You can use a U.2 to M.2 adapter to do this.
Just plug in your NVMe SSD on the adapter and plug the adapter into U.2 slot and enjoy near-native performance of an actual M.2 slot.
U.2 port was originally designed for enterprise-grade SSDs, but some high-end or workstation motherboards include it in their feature list.
This adapter works by converting the U.2 interface to support M.2 NVMe SSDs.
How it works:
- Plug your NVMe SSD into the adapter.
- Connect the adapter to the U.2 port on your motherboard using the included cable.
- Secure everything inside your case (especially the cable) just like you would with other components.
This method maintains excellent speeds near M.2 interface since the U.2 interface is based on PCIe, just like M.2 NVMe.
Pros
- U.2 interface maintains full NVMe performance.
- A good alternative to M.2 port.
- This method keeps your NVMe SSD inside the case for better airflow and protection.
Cons
- Your motherboard must have a U.2 port, which is not common in motherboards.
- U.2 to M.2 adapters and cables cost a bit more.
- Setup is a bit complex than a plug-and-play M.2 slot. You need some technical experience to install it inside the case.
If your motherboard supports U.2, this is one of the best ways to connect an NVMe SSD without sacrificing performance.
Option 4: NVMe to SATA Adapters (Actually Does Not Work)
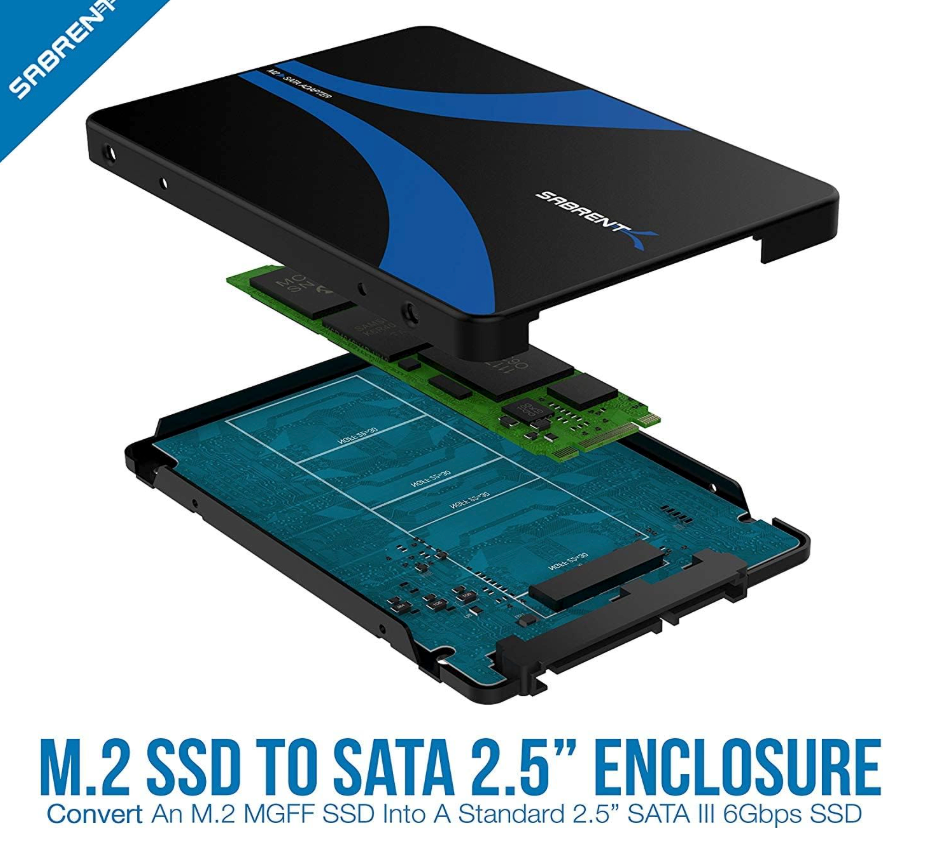
Well, NVMe to SATA adapters might seem like an easy fix if you’re missing an M.2 slot, but here’s the truth:
NVMe and SATA are entirely different protocols. NVMe SSDs use PCIe lanes for faster data transfer, while SATA runs on an older, slower interface.
So, NVMe to SATA adapters don’t actually exist in a functional form.
You can’t convert an NVMe SSD to work through a SATA connection, actually.
Confusing?
Well, some adapters are sold ambiguously, tricking you into thinking that they support NVMe over SATA.
But, in reality, they’re SATA-based M.2 SSDs, not true NVMe drives.
If you want to connect your NVMe SSD externally or through alternative ports, PCIe adapters or USB to NVMe enclosures are ideal solutions, not SATA.
So I don’t recommend this option as an ideal solution for using NVMe SSD without a M.2 slot on your motherboard.
Which Option is Best For You?
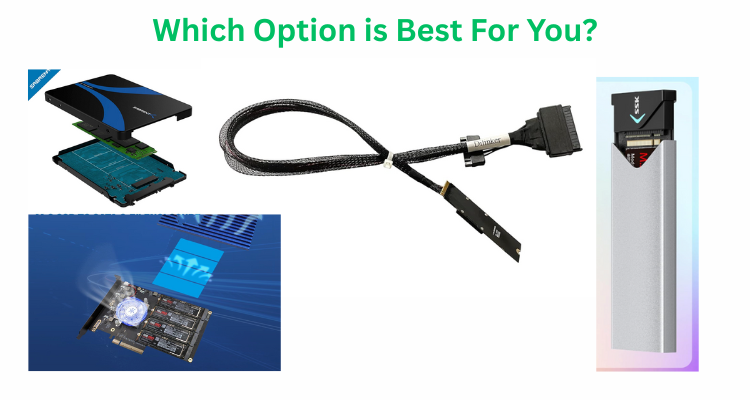
It all depends on your PC’s capabilities, your performance needs, and how you plan to use the SSD.
Let me break it down for you:
- PCIe to NVMe Adapter Card (For best performance): If your motherboard has an available PCIe x4 or x16 slot and you don’t want to sacrifice speed, it’s the best option. With this option. You get nearly full NVMe speeds, which makes it ideal for gaming, video editing, and other high-performance tasks.
- USB 3.2/Type-C to NVMe Enclosure (For portability and convenience): It is a perfect solution if you want an external solution along with a decent speed for everyday tasks, backups, etc.
- U.2 to M.2 Adapter (If your motherboard supports U.2): It is the best option if your motherboard has a U.2 slot. It offers nearly the same speed as an NVMe SSD.
- Avoid NVMe to SATA Adapters: I don’t recommend these adapters as they don’t actually work with NVMe.
Check For Compatibility and BIOS Configuration
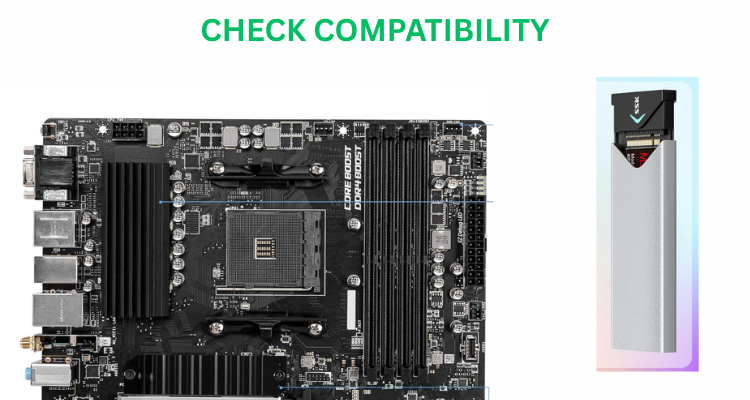
Before plugging in your new NVMe SSD via any of the adapter methods I’ve mentioned above, it’s crucial to ensure compatibility and prepare your system BIOS for the hardware.
Here’s what you need to do:
1. Check Your Motherboard Compatibility
- PCIe x4 or x16 slots avaialability
- Boot Support, especially if you are going to install the OS on it
- If you’re considering a U.2 to M.2 adapter, check if your board has a native U.2 port
2. Update BIOS (if needed)
- Update the BIOS as newer BIOS versions work efficiently in these cases.
- Visit your motherboard manufacturer’s site, download the latest BIOS, and follow the instructions.
3. Enable NVMe Support in BIOS
- Go to BIOS/UEFI Settings during boot (usually by pressing
Del,F2, orF10). - Ensure NVMe or PCIe storage options are enabled.
- If you plan to boot from the drive, set the boot mode to UEFI, not Legacy.
- Look for the drive under the storage tab to confirm it’s detected.
Quick Tip: If you’re using an external USB enclosure, you don’t have to update or change your BIOS configuration. Just plug it in and you’re good to go.
But remember, you can’t boot from most USB NVMe enclosures if your motherboard doesn’t support it.
Performance Issues
When connecting an NVMe SSD to a PC without an M.2 slot, you may face easily noticeable performance limitations, especially in the USB option.
PCIe to NVMe adapter cards offer the best speed potential when PCIe x4 or x16 slots are used.
On the other hand, USB 3.2 or Type-C enclosures significantly reduce performance and limit the speed to around 1000 MB/s.
Thermal throttling is another reason why NVMe drives lack performance.
They generate a lot of heat during intensive tasks, and without a cooling system, they are built to automatically reduce their speed to prevent overheating, especially in enclosures.
Conclusion
While it’s absolutely possible to connect an NVMe SSD to a PC without an M.2 slot, the method you choose will significantly impact your NVME’s performance.
If you need better speed, a PCIe to NVMe adapter card is my top recommendation, especially for gamers and video editors. Other methods are also good, but not as good as the first method.
Whatever route you choose, double-check compatibility and configure your BIOS properly for the best results.
Read also,
Gautam Roy is the founder of PCBuildHQ.Com and StartHomeStudio.Com. He has over 20 years of experience in web development, creative technology, system architecture, audio recording, music production and video editing.