
When building a gaming PC, cable management feels like an afterthought, right?
You think that you plug in your GPU, slam that side panel shut, and move on.
But wait. Over time, those messy cables start to become more than just a visual headache. They mess with airflow, increase dust buildup, give you pain when upgrading, and worst of all, PC temperature goes up, and stability can suffer.
It’s real, actually. Cable management isn’t just about making your gaming PC look clean; it directly impacts airflow, cooling, and future upgrades.
Poor cable routing can block fans, trap heat inside the case, and make future maintenance a nightmare.
So, the solution is, whether you’re building a new rig or tidying up an old one, managing cables properly can improve performance and extend hardware life.
In this guide, let’s walk through the exact tools, steps, and pro tips THAT I use to keep my gaming PC clean, cool, and clutter-free.
Let’s dive deep inside…
Read also,
Why Cable Management Matters in a Gaming PC
Cable management matters a lot when building a PC. It isn’t just for looks, but it plays a critical role in your gaming PC’s performance, temperature control, and future upgrades.
When you leave cables messy or bundled randomly, a few serious problems can creep in:
- Poor Airflow: Bad cable management can block the intake or exhaust fans, and hot air would be trapped inside your case and resulting in higher CPU and GPU temperatures.
- Dust Buildup: Cluttered cables disrupt airflow patterns, and dust settles in awkward corners, especially around fan filters and heatsinks.
- Difficult When Upgrading: Swapping a GPU, adding RAM, or troubleshooting becomes frustrating when your PC’s cables are cluttered.
- Unstable System: Loose or tangled power cables can sometimes disconnect or provide inconsistent voltage, and you may experience random crashes or boot issues.
And of course, it’s a matter of aesthetics, if you have a case with a glass panel, messy cables kill the visual appearance.
By organizing and routing your cables properly, you’re not just building a cleaner PC; you’re building a cooler, more reliable, and future-ready machine. Right?
Tools and Accessories You Need For Proper Cable Management
So, are you ready to build a PC without the cluttered cables?
Well, before you start managing cables, let’s get your toolkit ready.
You don’t need anything fancy or expensive tools, but having the right accessories makes your whole PC building process smoother and cleaner.
Here’s what I personally use (and recommend) for managing cables in any gaming PC build:
- Velcro Cable Ties – These are a must. Unlike zip ties, Velcro ties are reusable and gentle on your cables. Great for future upgrades.
- Zip Ties – They are useful for permanent bundles, especially behind the motherboard tray, where you won’t need to open properly.
- Cable Comb or Clip Set – This helps organize and align individual cables (especially for custom PSU cables) for a clean look.
- Adhesive Cable Tie Mounts – These are used to stick inside your case to create custom anchor points for routing cables exactly where you want them.
- Cable Sleeves – Cable sleeves are perfect for grouping and hiding messy cables, especially in RGB-heavy builds or behind your desk setups.
- Wire Cutters or Scissors – These tools are needed for zip ties or trimming sleeves.
- Label Tags or Stickers – These are optional; however, labeling your PSU cables can make upgrades and troubleshooting way easier later.
Pro Tip: You can grab most of these items in budget cable management kits under $20 on Amazon or Newegg.
My Step-by-Step Cable Management Process (Guide)
Cable management doesn’t have to be complicated when done right with the right tools and accessories.
Here’s my personal step-by-step process that I follow in every gaming PC build, designed to keep things neat, improve airflow, and make future upgrades easy, not messy. Let’s walk through it together.
Step 1: Plan Before You Plug
Before connecting a single cable, take a minute to plan things out. This step saves you a ton of time (and frustration) later. Start by positioning all your components inside the case, including the motherboard, GPU, storage drives, and power supply.
Attach them all in your case first.
Now, visualize how your cables will route from each component. Visualize how to route your cables through the space behind the motherboard tray. That is going to be your main cable highway.
Most modern cases have cutouts and grommets to help you route cables cleanly and out of sight.
Also, don’t forget the airflow zones. Keep power and data cables away from intake fans, CPU coolers, and GPU fans so they don’t block airflow or trap heat inside the case.
I have a personal experience when my AMD PC’s CPU fan broke down due to a cluttered cable around it, while changing the position of my PC. My PC was powered on, and this happened.
Planning at the very first makes the rest of the cable management process smoother, cleaner, and way more effective.
Step 2: Use the Right Cables and Lengths
One of the biggest mistakes I made in my early PC builds was using whatever cables came in the box. I was using them whether they were too long or too stiff.
Let me convince you. Choosing the right cables makes cable management so much easier, cleaner, and more satisfying.
Now, let’s talk length. Long cables initially might seem like a good idea. But in reality, they just create unnecessary slack that you’ll need to hide or bundle up.
The rule here is simple: shorter cables = cleaner builds. Extra-long cables mess behind the case. That makes it harder to manage and hurts airflow.
Choosing the right length of cables from the start saves a lot of space, looks better, and makes your routing way easier.
Here’s what I recommend:
- Use custom-length PSU cables if you’re aiming for a super clean look, especially in compact builds like ITX cases.
- Sleeved cables not only look more premium, but they’re also easier to bend and route neatly, especially when you are using cable combs.
- Right-angle SATA or PCIe connectors help reduce cable strain and help you manage tight spaces more efficiently.
- One more thing: Don’t forget to match cable colors with your build’s theme for an aesthetically clean, unified, and professional look.
Now let’s come to the 3rd step.
Step 3: Route Cables Smartly
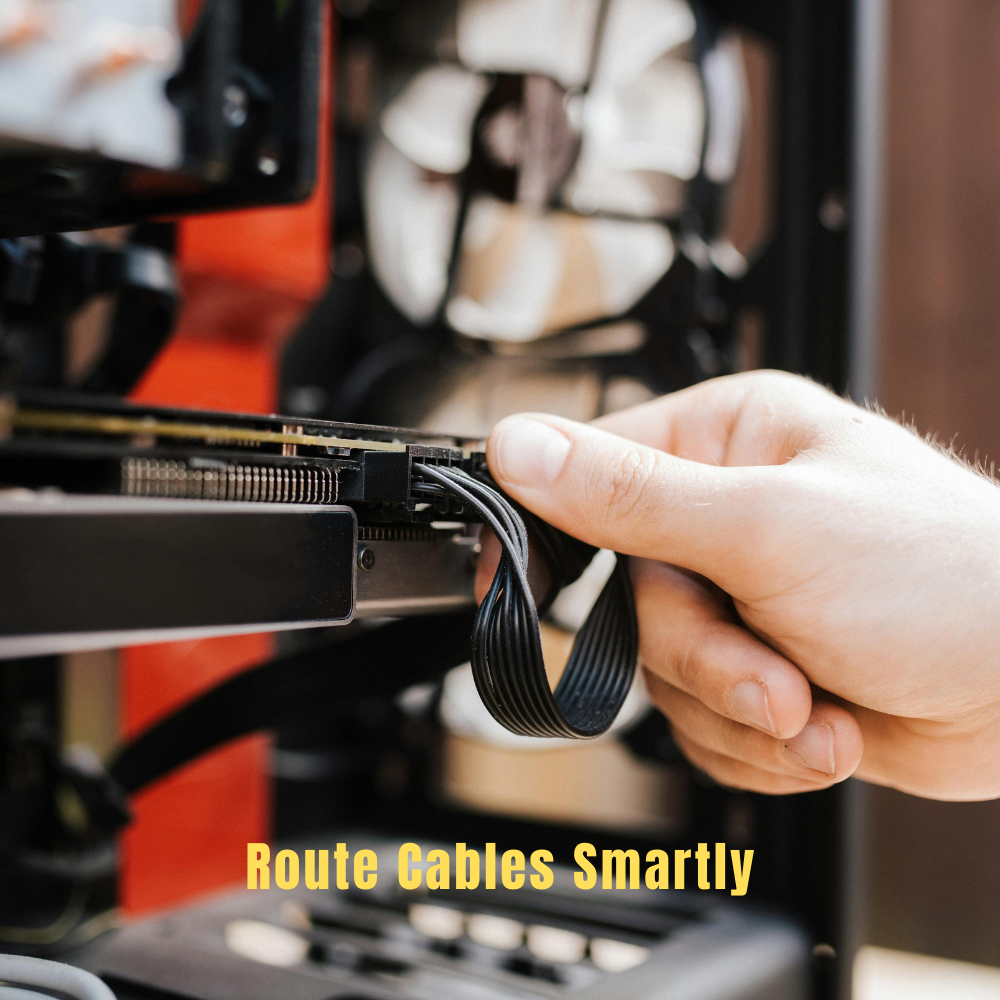
Now you have picked up the right cables. It is time to route them the smart way.
Take advantage of your case’s cutouts and rubber grommets and start from there. Most modern gaming cases are designed with cable management in mind. They offer strategically placed holes to pass cables through.
You can use these to keep power cables out of view and close to where they actually need to connect.
For example, you can route the 24-pin motherboard and CPU power cables through the nearest grommet without stretching across your board or GPU area.
The next step is to route all your main power cables behind the motherboard tray. This space is built to keep cables hidden and the front of your case neat and clean.
Some cables are messy ones, like fan and RGB cables. However, these are usually thin and short, but they are visible. Here’s what I do for their routing.
- Bundle all fan cables together and route them behind the tray or beside the case edges.
- You can use splitters or fan hubs to reduce cable clutter.
- For RGB, avoid daisy-chaining long strips. Instead, use a dedicated RGB controller or hub.
You will win when: no cables cross open space, no wires dangle near fans, and everything is out of view unless it’s meant to be seen.
Step 4: Bundle and Tie Them Down

Now you have your cables routed properly. The next step is to secure them. Remember, a clean route is good, but a clean, tied-down route is great. This type of routing keeps everything in place, reduces sag, and prevents cables from shifting when you close the side panel or move your PC.
Start by grouping cables by type. Grouping makes it easier to manage and trace them later:
- Group 1: Power cables (24-pin, 8-pin CPU, GPU cables)
- Group 2: Data cables like SATA or USB headers
- Group 3: RGB and fan cables
You can use velcro cable to tie them together. They’re reusable, adjustable, and won’t cut into your cables like plastic zip ties sometimes can. I always use Velcro for the main routing paths and zip ties for hidden or permanent sections.
This step makes your build look aesthetic and professional, without compromising future upgrades.
Step 5: Tuck, Hide, and Cover
This is the last step in our PC cable management step-by-step guide.
Start by tucking any remaining loose cables behind the motherboard tray, inside the PSU shroud, or behind drive cages. These areas are built-in hiding spots for cables.
Loop extra-long cables gently and secure the excess behind the tray.
Now your setup should be looking clean, airflow-friendly, and ready for the side panel to snap on with zero resistance.
My Pro Tips for Better Cable Management
After managing dozens of builds, I’ve learned a few practical tips that make a big really a big difference. These small details might seem minor, but they really help polish your build and make maintenance easier in the long run.
The first one is,
1. Stick to Black or Matching Cable Colors
If you’re going for a clean aesthetic, look use black cables. Black cables look great in most builds, but if you’re using sleeved extensions, pick ones that match your build’s color scheme, whether that’s all-white, a combination of red-and-black, or stealth-mode gray; it’s your choice.
Uniformity = professionalism.
2. Leave Slack Near Connectors
Always leave a little slack near cable connectors, especially on GPU, CPU, and motherboard power cables.
Overtight stretches may look good at first, but they can put stress on both the connector and the socket. This can further lead to wear, poor contact, or even accidental disconnection over time.
This is very important, so don’t underestimate this.
3. Label Cables If You Upgrade Often
If you are a hardware lover and update hardware regularly, labeling your cables can be a lifesaver. Use small tags or colored stickers to mark them.
4. Upgrade your case if it has bad routing
Some older or budget cases weren’t designed with modern cable management in mind. If you have this type of case, it might be time to invest in a newer case with better cable channels, tie-down points, and grommets.
Trust me, it makes a difference.
Budget Cable Management Accessories: My Recommendation
| Product | What’s Included | Best For | Price | Where to Buy |
|---|---|---|---|---|
| JOTO Cable Management Sleeve Kit | 4x Neoprene sleeves, zip-up closure | Hiding multiple cables under the desk or behind the monitor | ~$12 | Amazon |
| Avantree Reusable Velcro Cable Ties | 50-pack, 6-inch reusable Velcro ties | Bundling PSU, fan, or RGB cables | ~$8 | Amazon |
| ECHOGEAR Cable Management Kit | Cable raceway, 3M adhesive, mounting screws | Desk and wall cable routing | ~$19 | Amazon |
| OHill Cable Clip Organizer Set | 16 self-adhesive clips (various sizes) | Holding cables behind the desk or on the side of the case | ~$7 | Amazon |
| StarTech Zip Tie Mount Kit | 100 zip ties + 100 adhesive mounts | Securing cables behind the motherboard tray | ~$10 | Amazon |
Cable Management for RGB-Heavy Builds

- Group RGB cables by type and location – Separate 3-pin ARGB and 4-pin RGB cables, and group them according to the installation locations (top fans, front strips, etc.).
- Route cables neatly along case edges – Use grommets, cutouts, and utilize the backside of the motherboard tray to hide and organize cables.
- Use RGB hubs or controllers – Avoid daisy-chaining; instead, you can use dedicated RGB hubs from brands like Corsair, Cooler Master, or Lian Li to centralize connections.
- Mount your hub in a smart spot – Place your hub near your fan cluster or RGB zone to reduce cable clutter.
- Mark your RGB cables with small tags or stickers to save time when upgrading components or troubleshooting.
Conclusion
If you take time to properly manage your cables, it makes a noticeable difference, not just in how your gaming PC looks, but in how it performs.
When I did it, my case airflow improved, GPU and CPU temps dropped by a few degrees, and upgrades became way less frustrating.
There’s no more digging through a mess of wires just to swap a fan or add storage.
Even if you’re working with an older build or a budget case, if you invest a little time into cable management, it goes a long way.
Proper PC cable management makes your setup look cleaner, run cooler, and feel more professional.
Now’s the time. Grab a few affordable accessories listed above, follow the steps, and clean up your rig.
Related posts,
Gautam Roy is the founder of PCBuildHQ.Com and StartHomeStudio.Com. He has over 20 years of experience in web development, creative technology, system architecture, audio recording, music production and video editing.